
This month I started a mini project on Github to create a small knowledge base, all around the REST Client tool Postman. I’ve been using this tool for a while now and I’m a massive fan, I want to share some of the knowledge that I have gained, with other people.
It’s basically a list of examples that use the tool and its many cool features to interact with a public API. This wonderful resource has been created by Mark Winteringham. Mark has created Restful-Booker, a safe place for people to learn more about API testing and an active platform to try out tools like Postman.
In one of the examples, I explain how to the use Manage Environments feature. This will allow you to create an environment file, then assign pieces of data to variables. That data can then be referenced in any of your Requests within a Collection. This is very handy during the creation of an API, where you may have different environments to test the API like development, staging, pre-production etc. The routes of the API will generally stay the same but the baseURL will change depending on the environment location. Check out the example to learn more about this in more detail.
So why write a separate blog post?
I’m always fully open to learning new things and sometimes you stumble across things by accident or as the result of looking into something else. I love creating visual helpers when I’m trying to explain something – “A picture paints a thousand words”.
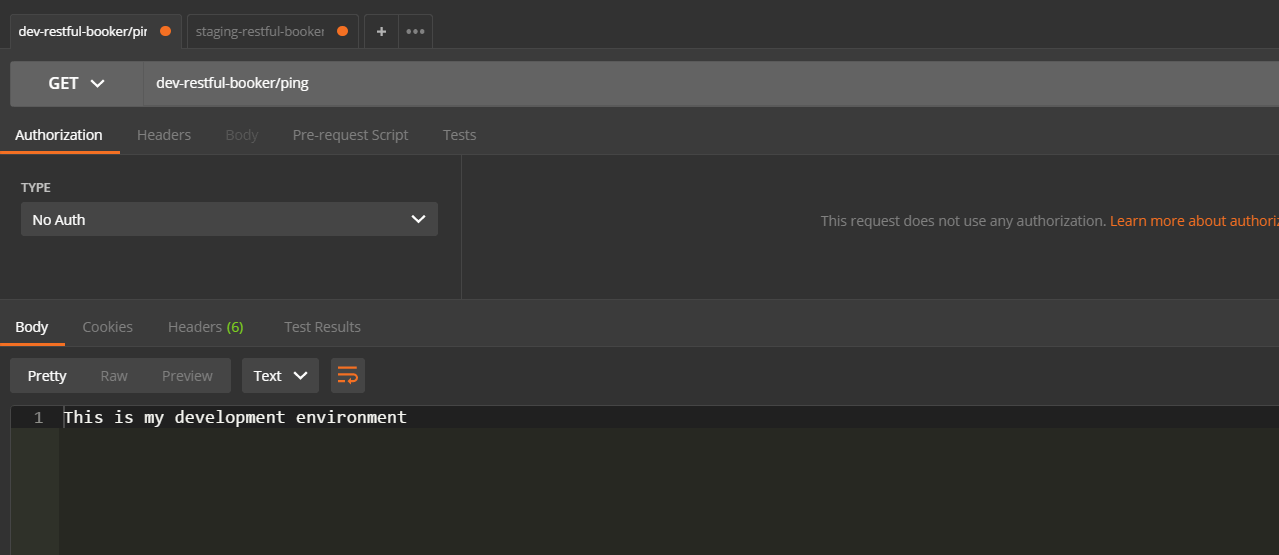
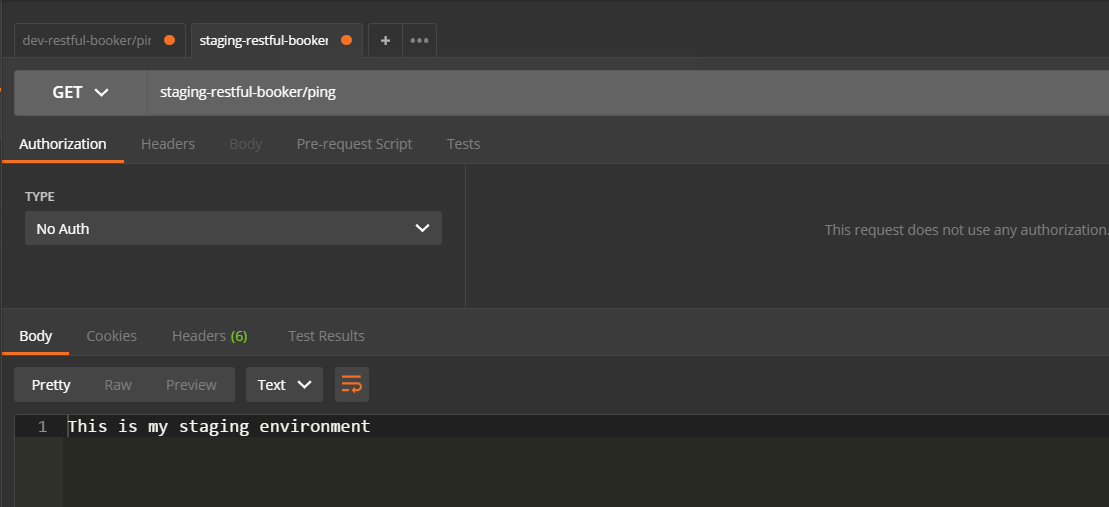
To fully explain what I meant by the different environments in the ramblings above, I thought I would just create a couple of super basic Nodejs Express APIs locally and then edit the Hostfile on my local machine to override the DNS for the localhost domain, so that I could show requests being made to dev-restful-booker and staging-restful-booker in Postman.

So I added the names to my local Hostfile and started the APIs…that’s when I hit my problem…I wasn’t aware, until I tried it out, that you couldn’t use the IP + port number as an entry in the Hostfile. Using the IP on its own is fine but it didn’t like me adding the port number too! 😦
This meant that my amazing idea of showing this in action on Postman was ruined….or was it?! I headed to Google, that’s what we all do right – Thankfully, It didn’t take long till I found a comment on Stackoverflow, that mentioned that you could just use the HOSTS feature on Fiddler to do this instead. Fiddler is a free web debugging proxy tool and is an absolute must have for Developers and Testers working in the web development space. I use it all the time but because I never had a need to do it, I wasn’t even aware that you could do that within the tool.
To access this feature is simple. In Fiddler, select the Tools menu option and then select the HOSTS… option at the bottom of the list. I added the following entries and hit Save.
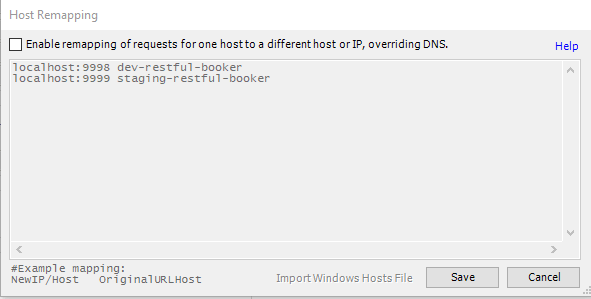
I spun up my two mock node APIs and bingo!! We were back in business!!
So that was it, Fiddler saved the day and I was able to add what I needed to the Postman example and learnt something new in the process! Win – Win!!
Please do check out my examples on Github if you’re interested in learning more about different ways that you can use Postman.
Thanks for reading!!
