
I’m still in the random data creating mood, so I thought I would extend my last post slightly by showing / explaining how you can quickly add some of the random data that you have created, into Bug Magnet as a custom config file.
If you haven’t heard of this Chrome and Firefox extension…where have you been?! I’m a huge fan of this tool, it’s assisted me during numerous testing sessions since I discovered its existence. A while back, a new feature was added allowing you to add your own JSON files – This was a game changer for me, It allowed me to create lots of different custom files specific to my context, for me to use whenever I needed too. Adding and Removing Files is soooo quick and easy that it really makes having something this valuable in your testers toolbox, an absolute no brainer.
A better explanation of what you can do with Bug Magnet can be found here. Neil Studd is extremely good at walking through how you can/could use the tool.
Let’s extend what we have already…
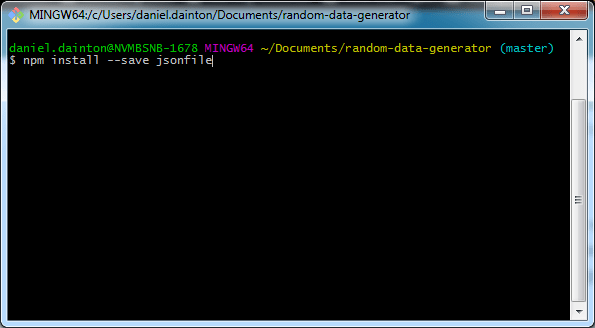
Open a command prompt or terminal, in the directory where you saved the random-data-generator app (Go and check out my last blog post if you’ve forgotten already). We’ll need to bring in the jsonfile module to our app, this will help us create the file that we can use with Bug Magnet.
Type the following command and press Enter. This will install the module and also add it as one of the dependencies in our previously created packages.json file.
npm install --save jsonfile
Once that has finished installing, it shouldn’t take very long, create a new file and save this in the random_data_generator directory. For this example, I’ve named the file cardDetails.js. As you can tell by the name, this will create some random payment card details.
Add the following code to the new file:
// Dependencies

var casual   = require('casual');
var jsonfile = require('jsonfile')

var file = 'cardDetails.json'
jsonfile.spaces = 4

// Random Card Data Set

casual.define('cardDetails', function() {
 return {
     Name        : casual.full_name,
     Card_Type   : casual.card_type,
     Card_Number : casual.card_number(casual.card_type),
     Card_Expiry : casual.card_exp
   };
});

// Write the result to a json file

jsonfile.writeFile(file, casual.cardDetails);
Like before, I’ll briefly explain what’s going on here – At the top we are bringing in the modules, casual is our random data helper and jsonfile is the module that’s going help us out with creating the JSON file (Say’s it all in the name really). Next, we have the file variable and this, as you would have guessed, is where we are naming the output file. At the moment this is just getting saved to the root directory of the app but you can specify a location anywhere on your system if you like, entirely up to you. Just down from this is the spaces that you would like to set, I’ve set it to 4 on this occasion as the default value is null and 4 gives you a lovely pretty print feel. Have a play about with it and set what you think is right.
In the middle of the file is the meat of the operation, this is creating your random data. Previously, we used user data and saved this in the user.js file, I’ve just mixed it up a bit and used a different data set. Lastly, we have the line that will write all the output to the JSON file.
Time to create the JSON file…
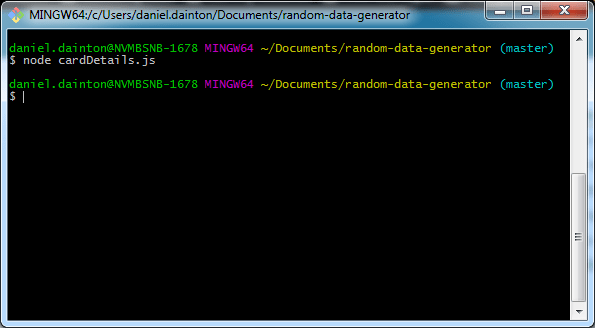
In a terminal, type the following command and press Enter. This will do the business and create the JSON file.
node cardDetails.js
You should now be able to navigate to the file, in the location that you set in cardDetails.js and it can be opened up in a text editor.
The cardDetails.json file will look something like this (with different data obviously).
{
    "Name": "Kristopher Hickle",
    "Card_Type": "Visa",
    "Card_Number": "4485446830945271",
    "Card_Expiry": "04/17"
}
Add the file to Bug Magnet…
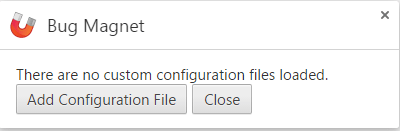
I’m assuming that you have the extension already installed, if not, go do that now.
In the Chrome browser type chrome://extensions/ into the address bar and press Enter, Select the “Options” button on the Bug Magnet extension.
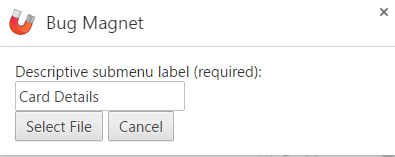
Select the “Add Configuration File” button.
The Name that you enter in this field, will be the name that appears within the context menu in Bug Magnet, next to the default ones (Names, Cities, E-Mail addresses etc.).
Press the “Select File” button and navigate to the cardDetails.json file. Select the “Open” button and this will then add the new config file to Bug Magnet. That’s it, it is now ready to be used in anger against the site you’re testing.
We’re now done – I’ve taken you this far, it’s now up to you to create the data and start using it in association with Bug Magnet.
To finish off…
These guides are obviously very basic and full of potential problems, I can see loads myself. They are not intended to be perfect, I view them more as a helping hand to get you started. Even if you don’t follow my method of creating random data, please do go and check out Bug Magnet – The default data that comes with the extension has found me so many bugs over the last couple of years!! At NVM, we have created our own repository of JSON files that is in a shared location, these can be tapped into and used by anyone, not just testers. All we need to do is import them into Bug Magnet before a test session and we’re set.
I created a really poor set of instructions for my team on how to create these custom files (using manually added data) a while back – you can find them here.
I’m still learning how to use GitHub and I continued my learning by trying to add all the files I’ve mentioned in the blog posts to a new repository. I think I sussed it but there are a few dodgy commits on there – Feel free to take a look here.
I’ve enjoyed writing these, it helps cement in my mind what i know and whIt i need to improve on, thank you for reading!!
